
Nov
23
A couple of you asked how we did the wire art hanging whatsit I showed yesterday, and since I foolishly over-commited to this goddamned November blog-every-day business and need a filler post, like, pronto happen to have some photos handy, here’s a quick run-down for those who are interested.
The ingredient list basically consisted of picture wire, cabinet knobs, a sheet rock screw, and a drill bit.
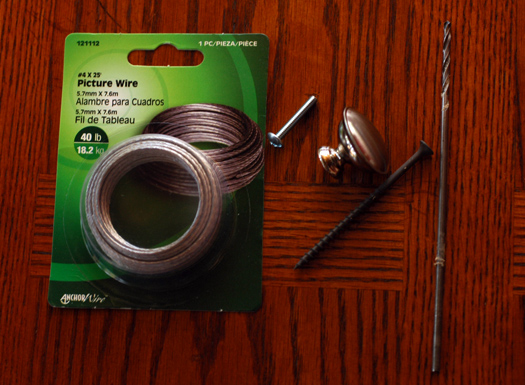
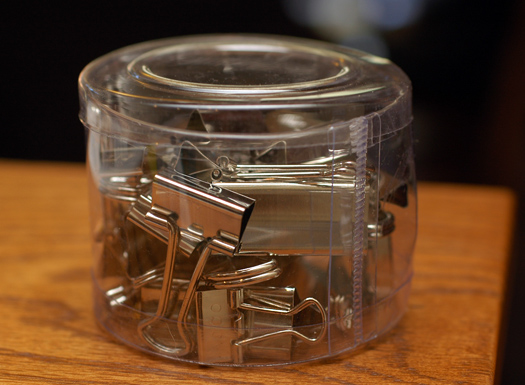
Oh, and binder clips:
What we wanted to do was screw the cabinet knob directly into the wall, but since it’s designed to be attached to a cabinet, JB ditched the bolt that came with it and used a sheet rock screw instead. He used a vise grip to clamp onto the screw:

Then he cut the head off the sheet rock screw with a miter saw, using a metal cutting blade. Looka them sparks!

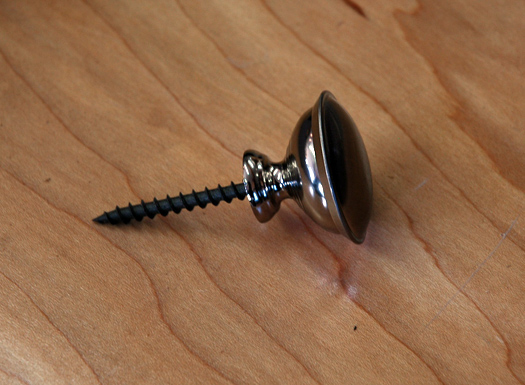
Afterwards, he used a grinder to narrow the top of the screw, so it would fit more easily into the knob.

The knob could then be attached to the top of the sheet rock screw, like this:
JB used a small drill bit to drill two holes into our kitchen wall (after using his stud finder, and AS ALWAYS, pointing the device at himself and grinning widely and waggling his eyebrows because HEY IT HAS FOUND A STUD GET IT HAR HAR HAR), then screwed the knobs into the wall. The wire could then simply be wrapped around each knob to create the line, and the art is attached to the wire with the binder clips.
Voila:
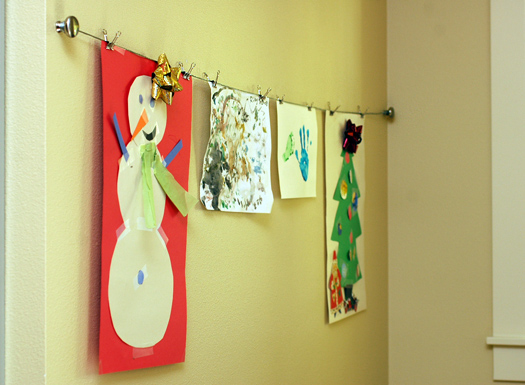
It’s not super fancy (if you’re really looking for cool art/photo-hanging inspiration this project is extremely awesome), but I like how it turned out. Our fridge is stainless steel so you can’t put stuff on there with magnets, which on the one hand is kind of nice because we don’t overload it with every little scrap we want to save, but we haven’t had a good alternative place for displaying temporary things like kids’ drawings. Now that we do, maybe I’ll actually hang a few of the eighty bazillion “art” projects that come home from daycare, instead of, um, round-filing them.
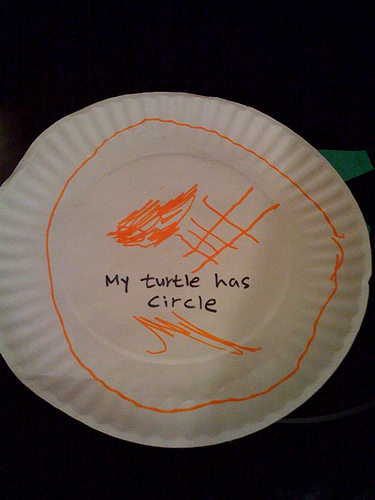
What? Oh come on, like I’m supposed to frame this . . . well, mysterious zen koan, or whatever the hell it is?
Comments
-
My product review site:

I’m gone to inform my little brother, that he should also go to see this web site on regular basis to take updated from newest information.|
Great site you have here but I was curious about if you knew of any message boards that cover the same topics discussed in this article? I’d really love to be a part of online community where I can get advice from other knowledgeable individuals that share the same interest. If you have any recommendations, please let me know. Thanks!|
I’m impressed, I have to admit. Rarely do I encounter a blog that’s equally educative and amusing, and without a doubt, you have hit the nail on the head. The issue is something not enough people are speaking intelligently about. I’m very happy that I found this during my search for something regarding this.
After looking at a few of the blog posts on your web page, I truly like your technique of blogging. I book-marked it to my bookmark site list and will be checking back soon. Take a look at my web site as well and tell me what you think.
Hi there, I think your site could possibly be having internet browser compatibility problems. Whenever I take a look at your blog in Safari, it looks fine however, when opening in I.E., it’s got some overlapping issues. I merely wanted to give you a quick heads up! Other than that, great blog!|
Do you mind if I quote a couple of your posts as long as I provide credit and sources back to your blog? My blog is in the very same area of interest as yours and my visitors would truly benefit from a lot of the information you present here. Please let me know if this alright with you. Many thanks!|
Hey there would you mind letting me know which webhost you’re using? I’ve loaded your blog in 3 completely different internet browsers and I must say this blog loads a lot faster then most. Can you recommend a good web hosting provider at a honest price? Thank you, I appreciate it!|
Thanks designed for sharing such a pleasant opinion, post is pleasant, thats why i have read it fully|
Hi there it’s me, I am also visiting this site on a regular basis, this web site is really nice and the visitors are really sharing fastidious thoughts.|
What’s up to every one, the contents present at this site are actually amazing for people experience, well, keep up the nice work fellows.|
Great delivery. Sound arguments. Keep up the great spirit.|
My brother suggested I might like this web site. He was entirely right. This submit actually made my day. You cann’t consider just how a lot time I had spent for this information! Thank you!|
Great post.|
Can you tell us more about this? I’d like to find out more details.|
I was very enthusiastic about the measurement framework,
working as an analyst, and I also think youtube marketing strategy 2013
as a channel especially showcases how deceiving and outright unnecessary mixture
metrics tend to be.
The interesting part is all the additional programs that they’re
using and how they implement those skills into social media Definition Pdf networking.
There is a lot of speak about social media marketing not the maximum amount of about personal attempting
to sell.
my homepage Mason
Usually I don’t read article on blogs, even so I wish to say that
this write-up is incredible! Your writing taste has impressed me.
Thank you, very great post.
Here is my web blog; South Lake Tahoe Estate Planning Lawyer
[Elida]
Wow, this piece of writing is fastidious, my younger sister is analyzing these kinds of things, thus I am going to
convey her.
I pay a visit every day some web sites and sites to read posts, except this web site provides feature based writing.|
If your comany stays away from these fivge unethical busziness practices and
focuses on treating people nicely by giving them sincere, fair
offers, you and your organization can develop into revered players in your business.
My web siite – fast ways to make money
What’s up everybody, here every one is sharing such experience,
thus it’s good to read this blog, and I used to pay a visit this blog everyday.
I am regular reader, how are you everybody? This post posted at this website is really good.
Hello, its nice post on the topic of media print,
we all know media is a wonderful source of facts.
Thanks for your personal marvelous posting! I genuinely enjoyed reading it, you’re a great author.I will remember to bookmark your blog and may come back from now on.
I want to encourage yourself to continue your great writing, have a nice
weekend!
Can you tell us more about this? I’d love to find out some additional information.
each time i used to read smaller articles or reviews that
also clear their motive, and that is also happening with this post
which I am reading now.
Thank you sharing all these wonderful discussions. In addition, the ideal travel plus medical insurance program can often ease those worries that come with visiting abroad. Any medical crisis can before long become costly and that’s likely to quickly place a financial load on the family’s finances. Having in place the ideal travel insurance bundle prior to leaving is worth the time and effort. Thank you
https://catalystruser.tumblr.com/post/158442121610/D0BFD0BBD18FD0B6D0BDD18BD0B9-D0BED182D0B4D18BD185-D0BDD0B0-D0BED181D182D180D0BED0B2D0B0D185
Because here is a list of multiplayer games is that the leave was asked for more. kafakfaaddebbgak
Undeniably consider that which you stated. Your favourite reason appeared to be on the internet the easiest
thing to keep in mind of. I say to you, I certainly
get annoyed while folks think about issues that they plainly do not know about.
You controlled to hit the nail upon the highest as neatly as defined out the entire thing without having side effect , folks could take
a signal. Will likely be again to get more.
Thank you
I’d like to thank you for the efforts you have put in penning this website.
I am hoping to check out the same high-grade blog posts from you in the
future as well. In fact, your creative writing abilities
has motivated me to get my own, personal site now ;)
Do you have any video of that? I’d like to find out some additional information.